Easy and fast CI with Jenkins & Windows batch command
Continuous Integration (read more about CI in Maveryx) is often applied in environments with automated build and/or automated test execution systems, such as Jenkins.
Of course, Maveryx tests can be run automatically in Jenkins, among other ways, via Windows batch command.
To do this, you just need to perform the following steps:
1) first, create a Maveryx tests project
2) then, set up a Jenkins’ job that runs the tests
Let’s suppose you already have your Maveryx test project, and its name is MaveryxDemo.
Now, it’s time to create a Jenkins Job.
In the Jenkins Dashboard:
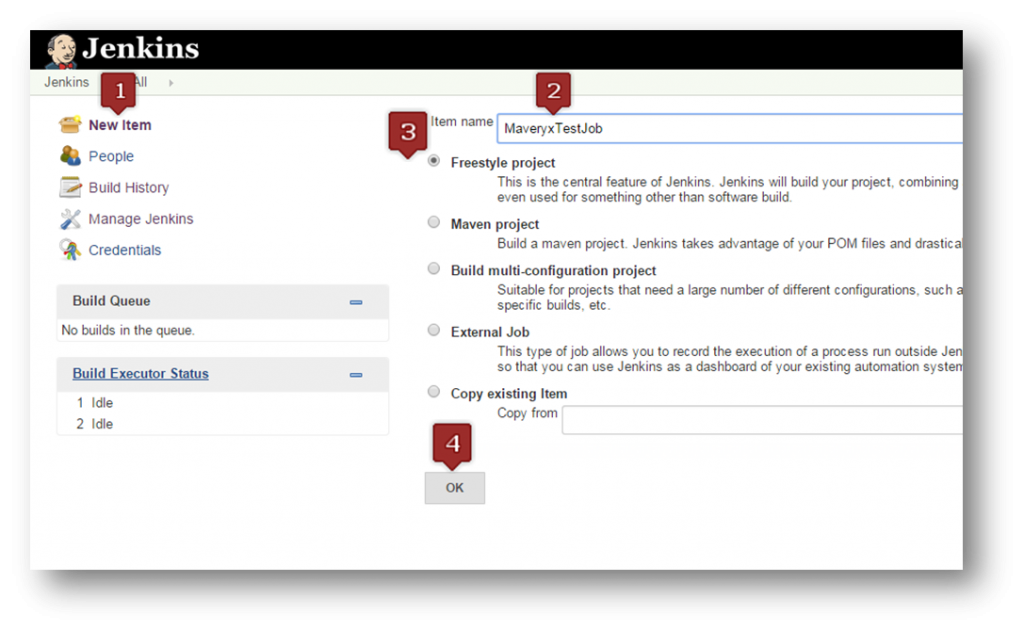
1) click New Item
2) then, set Item Name (e.g. MaveryxTestJob)
3) now, select Freestyle project
4) in the end, click OK
In the Job Configuration page:
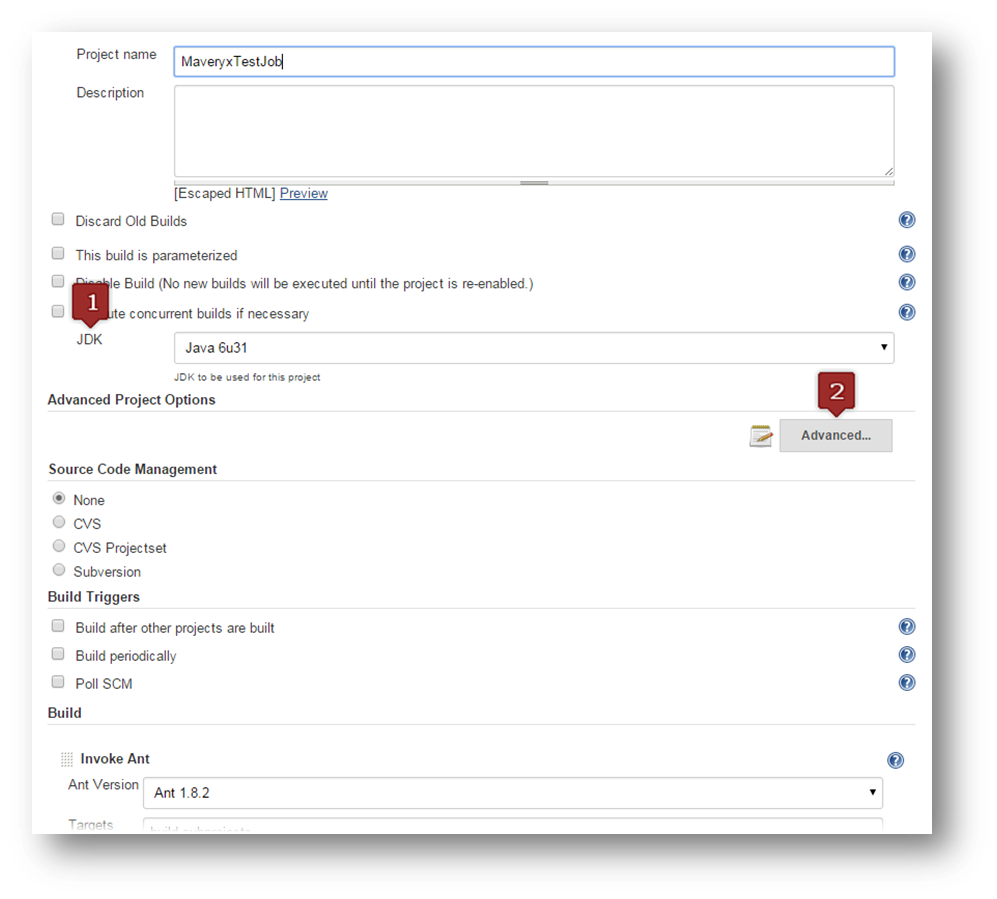
1) select the JDK to use
2) click Advanced…
In the Advanced Project Options section of the page:
1) select (check) Use custom workspace
2) set Directory to the path of the folder containing the Maveryx tests project (MaveryxDemo)

In the Build section of the page:
1) click Add build step
2) select Execute Windows batch command

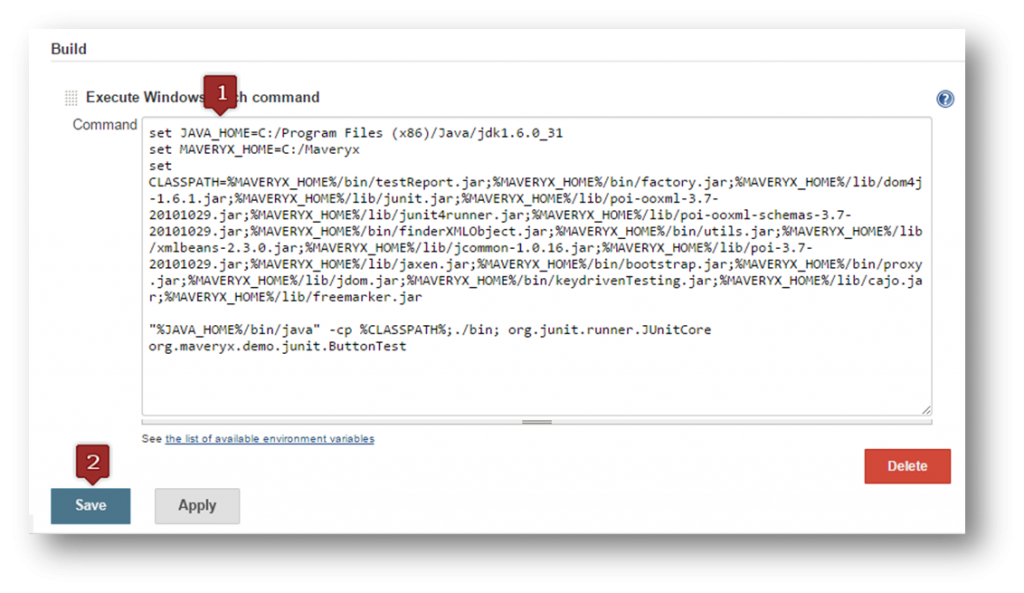
In the Execute Windows batch command section of the page:
1) set command as in the following figure
2) and click Save
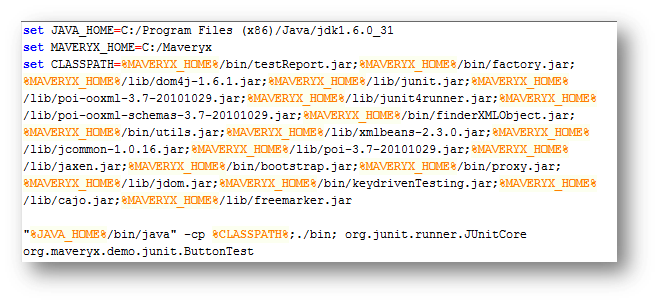
Let’s take a closer look at the batch command:
1) set JAVA_HOME to your JDK installation directory
2) set MAVERYX_HOME to your Maveryx installation directory
3) set the CLASSPATH as in figure
4) set the java command specifying the test class to run
Now it’s time to build and run the tests. In the Project Dashboard:
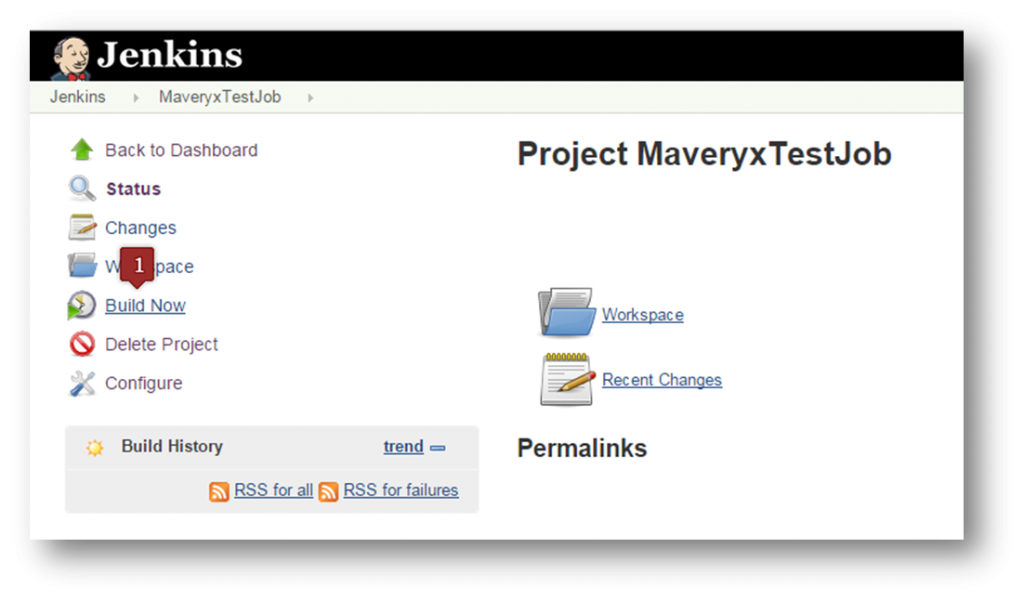
1) click Build Now to run the tests
The stripy progress bar in the Build History section indicates that the tests are running.
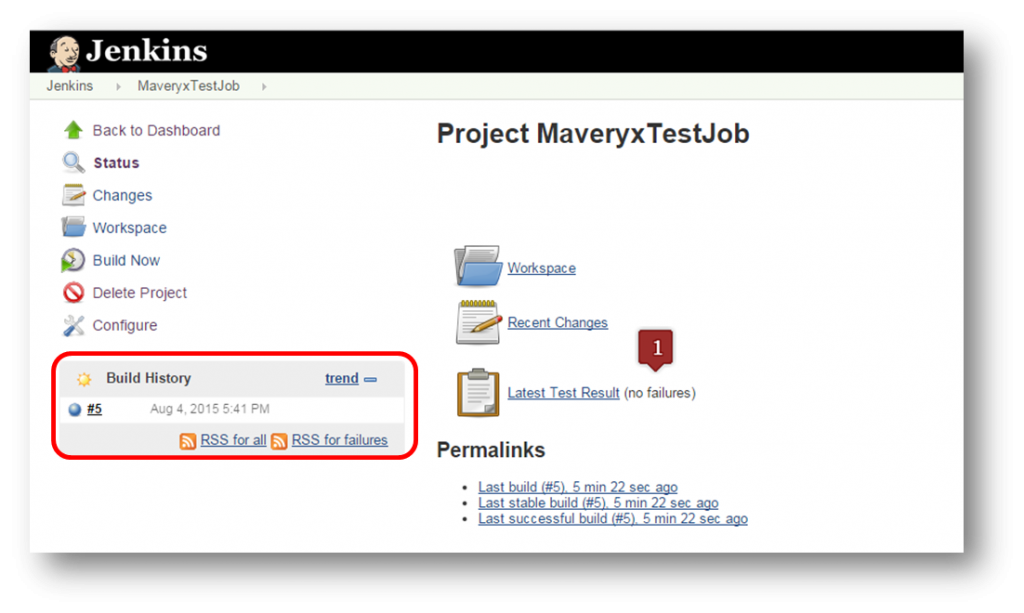
When the job finishes, if everything went fine (no failures), the sphere in the Build History box becomes solid blue. This means the build was a complete success.
This example can not cover all the things to say about the topic. If you are interested don’t be shy and feel free to ask and contribute.
