CI: Azure DevOps with Ant
Maveryx tests can be run automatically in ADO with Ant.
To achieve this goal, the following steps must be followed:
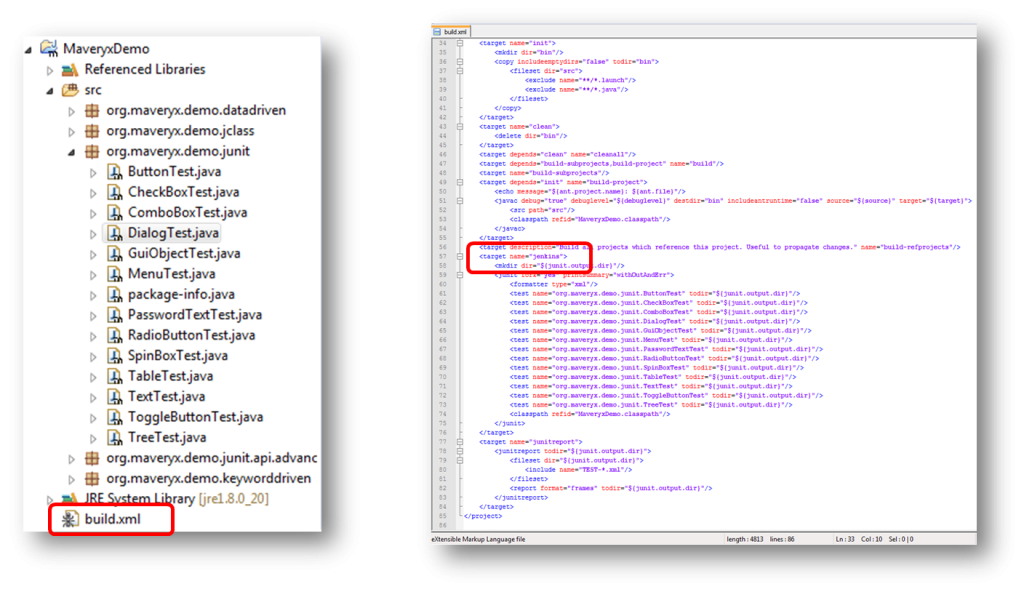
1) Create a Maveryx tests project
2) Create an Ant build file that executes the tests of the project
3) Set up ADO to run the tests & publish the results
Let’s suppose you already have your Maveryx test project, named MaveryxDemo, and the ANT build file.
Now it’s time to set up ADO:
1) Log in into your ADO account
2) click + New project

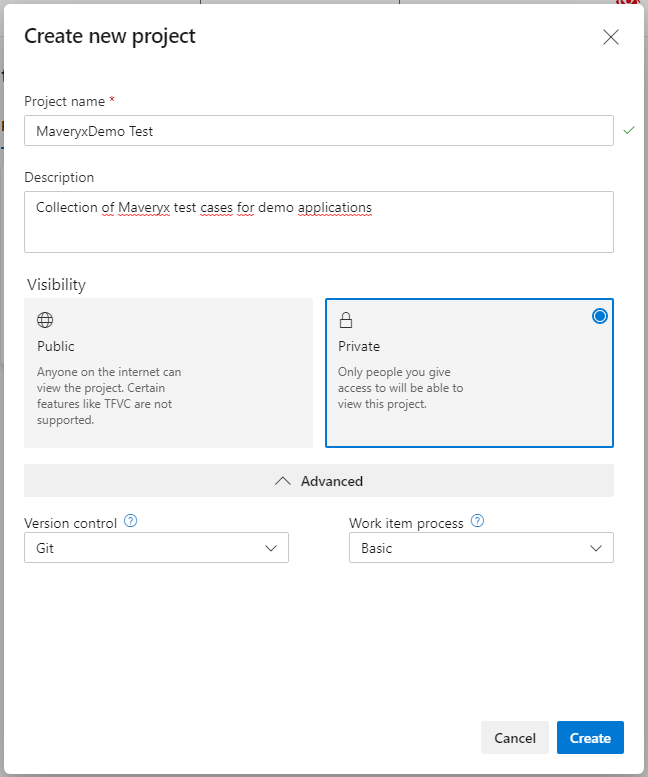
In the new project page:
1) Set the Project name
2) Select Visibility to private
3) Select your version control software (Git in this example) as Version control
4) Click Create
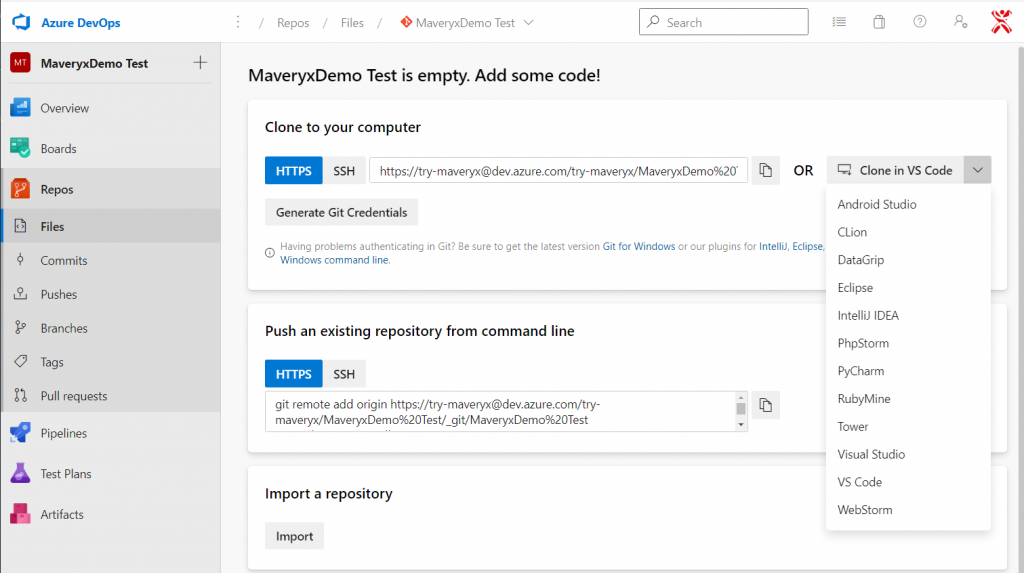
In the Azure DevOps Project page:
1) Click “copy URL” button in Clone to your computer
2) In cli write git clone and paste the URL
3) Press enter to execute the command

Install Self-hosted agents where Maveryx is installed.
Follow instructions at this page.
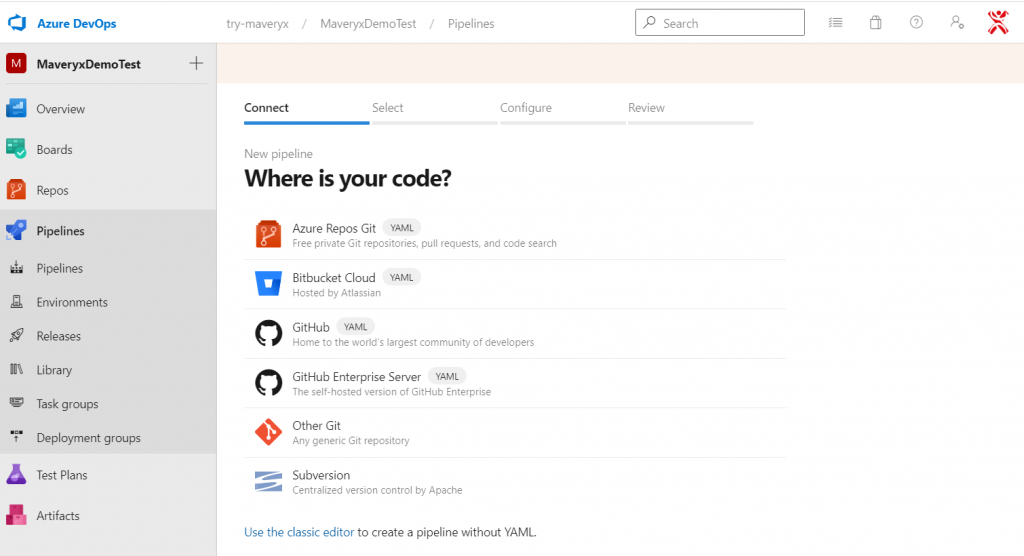
Now it’s time to create your Pipeline.
In your project page:
1) Click Pipelines in the list on the left
2) Click Use the classic editor.
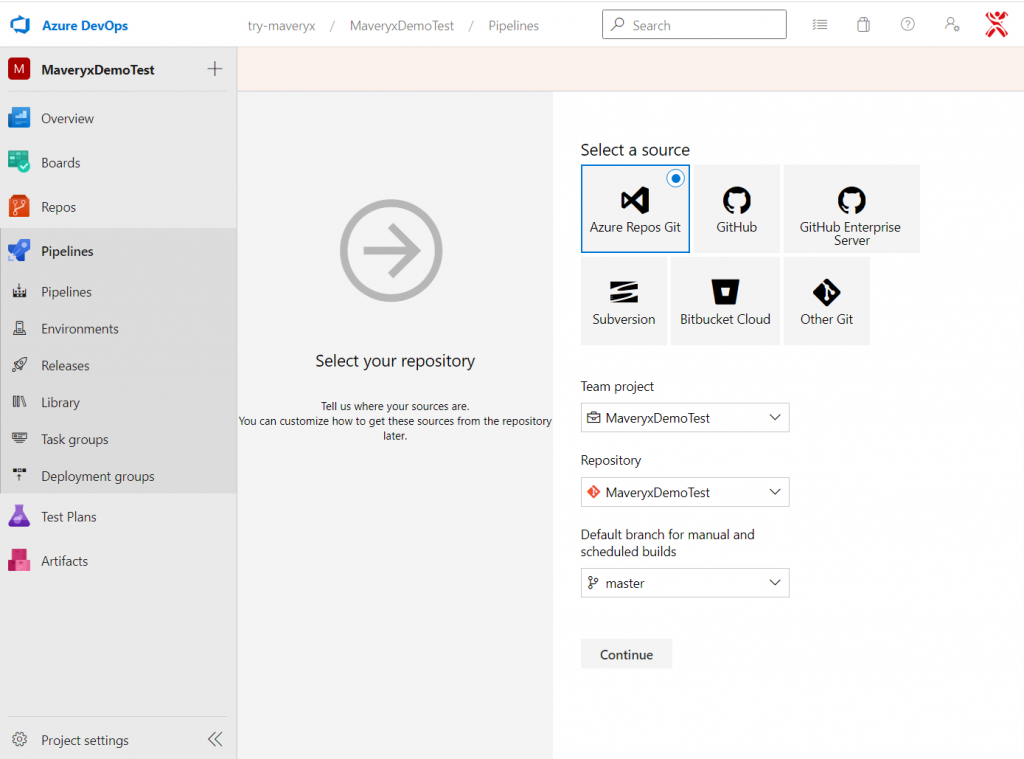
Configure the repository as shown in figure and click Continue
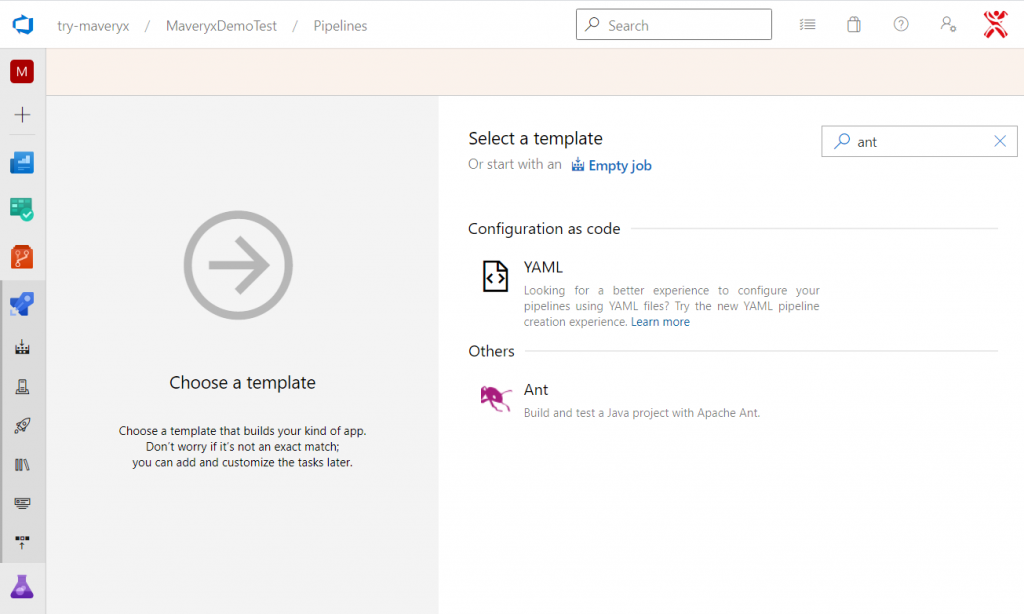
Select a template:
1) Write “ant” in the search box
2) Select the Ant template
3) Click Apply
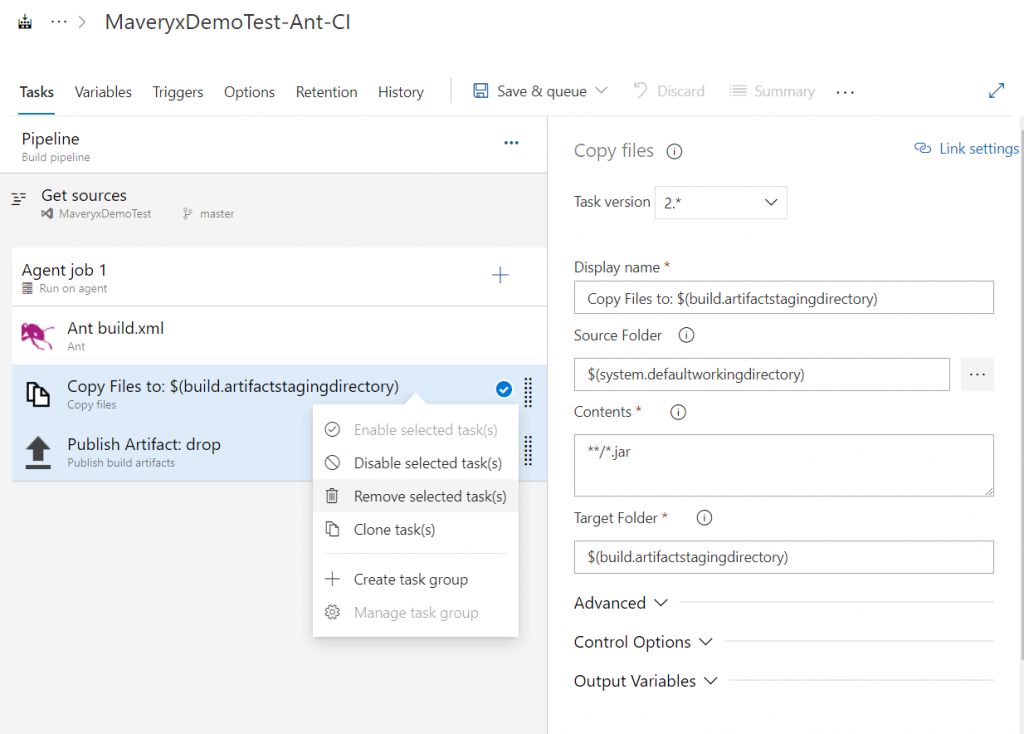
Remove unused Tasks
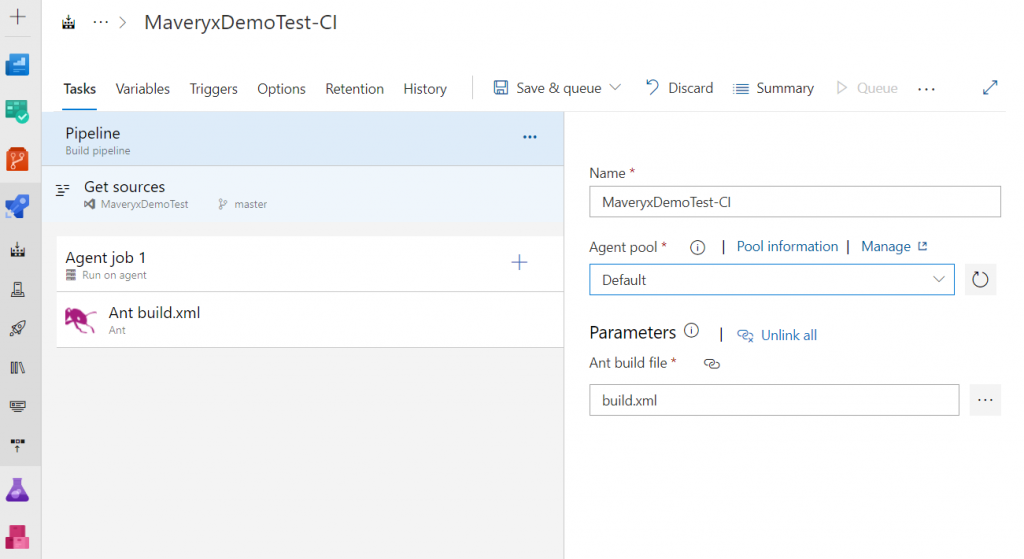
Pipeline configuration:
1) Set the pipeline name
2) Select the agent pool for the pipeline
3) Select the ant build file
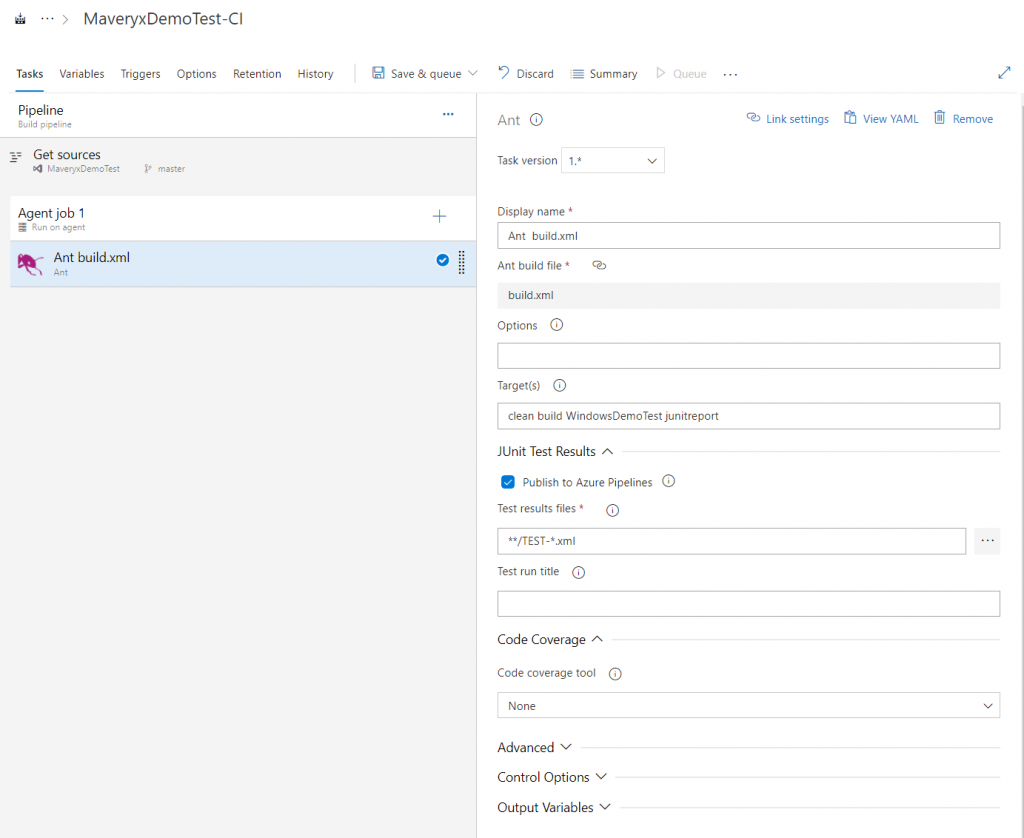
Tasks configuration:
1) Select Ant Version to be used
2) Set Targets to
build-subprojects
init
build-project
build
azuredevops
junitreport
3) Save the pipeline
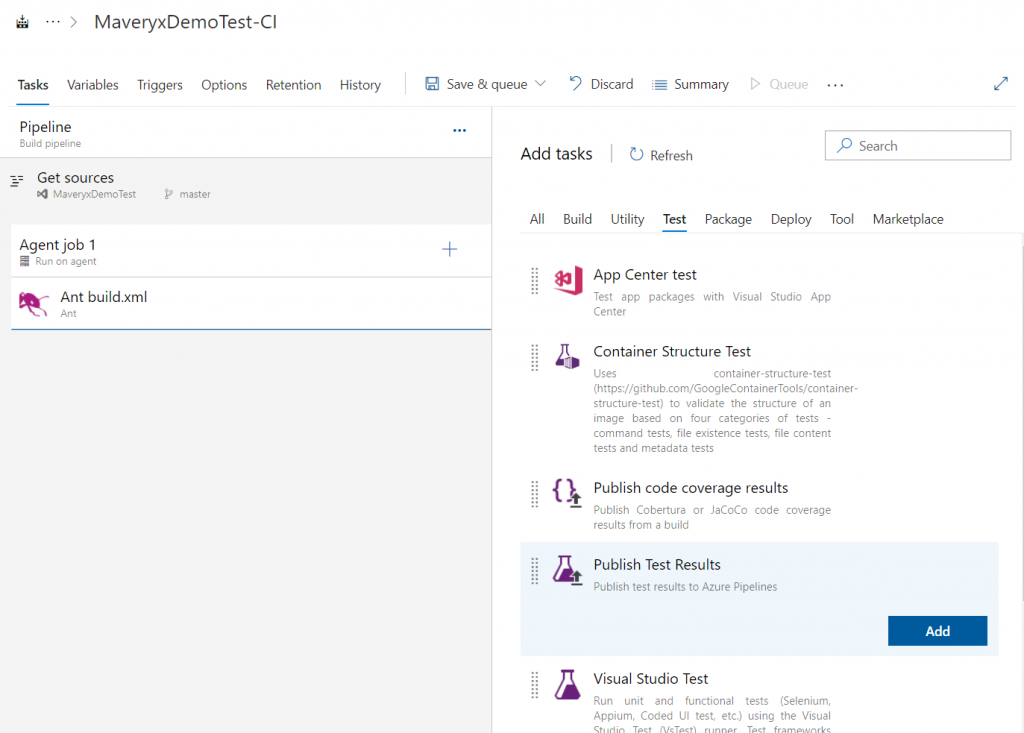
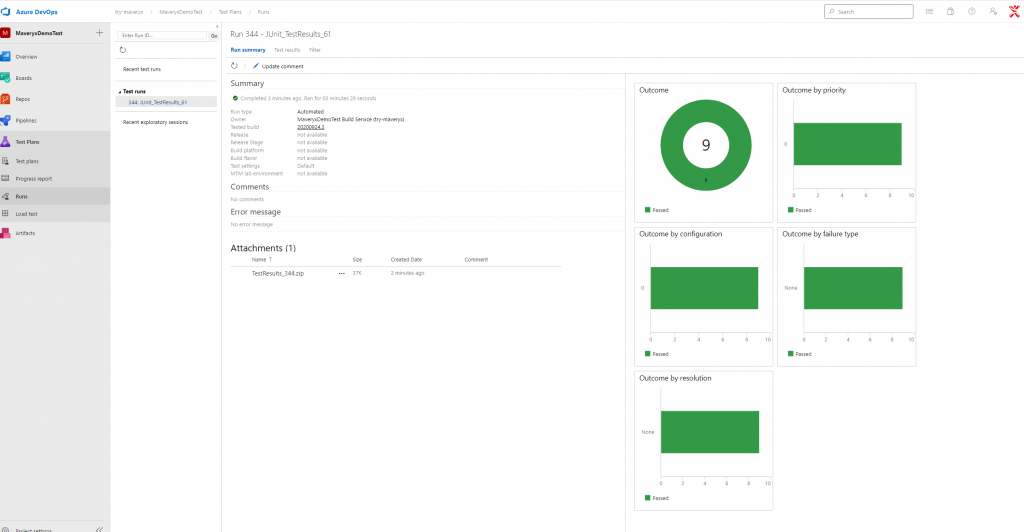
Add the task Publish Test Results:
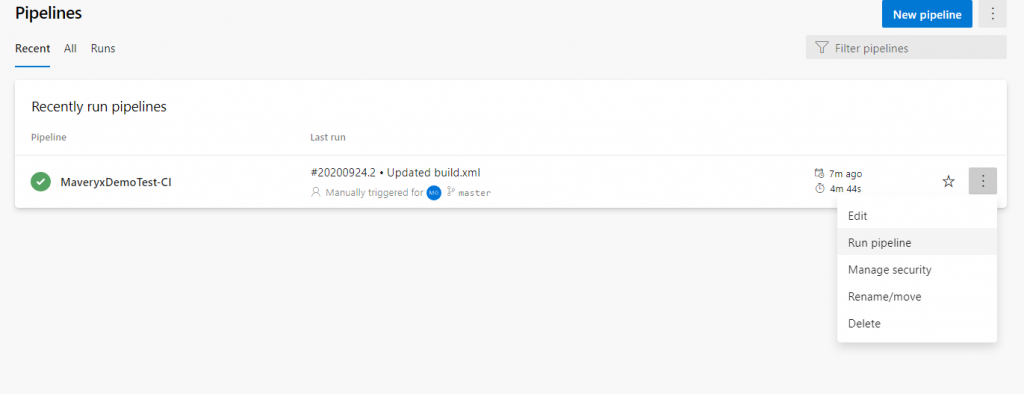
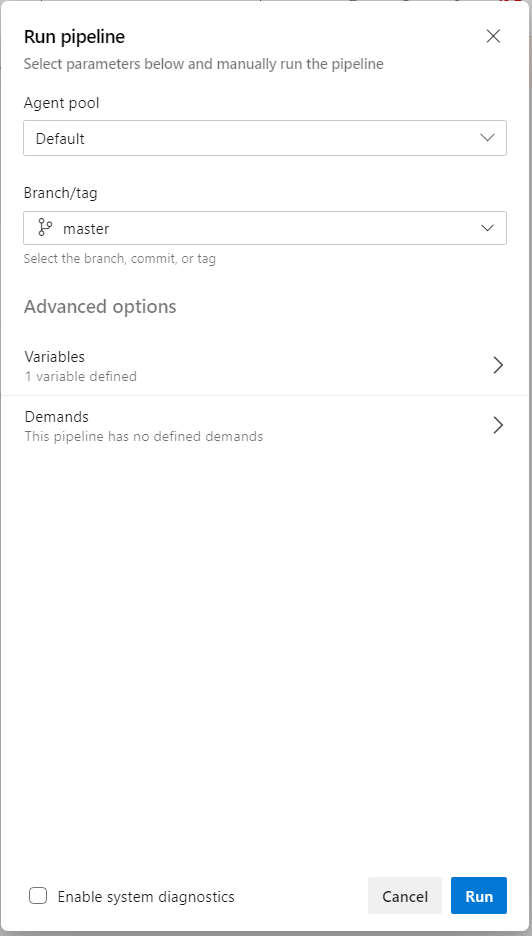
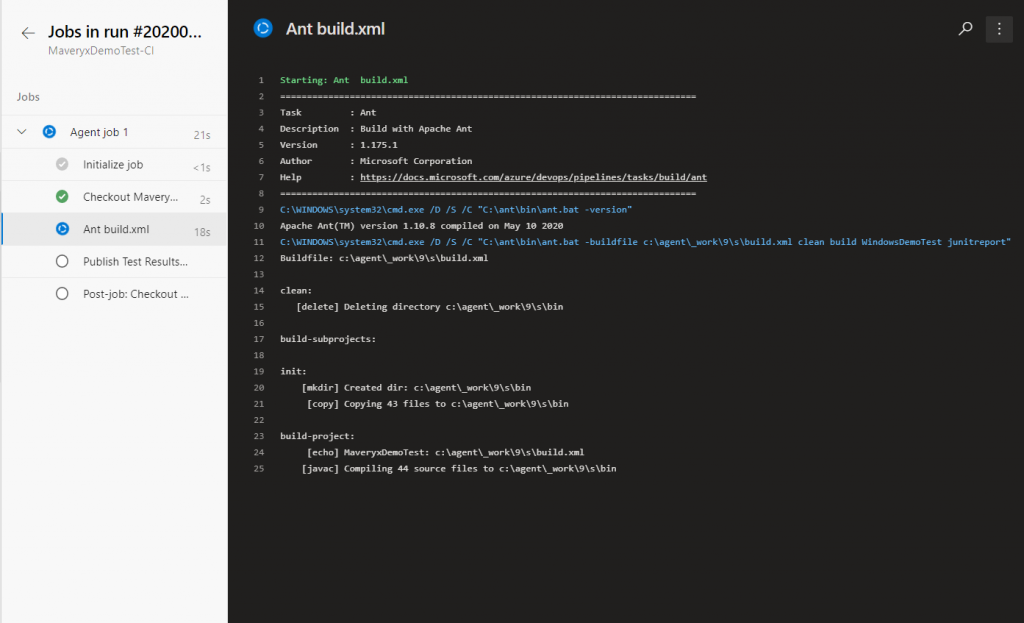
Now it’s time to run the pipepine:
This example can not cover all the things to say about the topic. If you are interested don’t be shy and feel free to ask and contribute.